Thursday, December 8, 2016

Stuffed Peppers Holiday Style

Stuffed peppers are a meal that can be made with little preparation and clean-up and 45 minutes to an hour in the over. Serve with a salad, wedge of gluten free bread, or size of roasted vegetables and potatoes.

When you use both red and green bell peppers the make ahead meal turns into a beautifully festive meal.


Base Ingredients:
  1. 1/2 pound ground meat
  2. 1 cup rice
  3. 1 cup gluten free tomato soup (+ more for garnish at serving time)
  4. Salt and Pepper to taste
  5. Pinch of pepitas for garnish at serving
  6. 3 bell peppers (fits well into a baking dish)


Instructions:
  1. In a mixing bowl combine meat, rice, soup, and salt and pepper to taste
  2. Carefully slice the top off the peppers, remove stem, and remove seeds
  3. Stuff the peppers
  4. Top peppers with portion you cut off - with stem removed
  5. Place in a foil lined baking dish and cook at 350 for 45 minutes to an hour (depending on size of peppers and temperature of your oven)

Variation: 
To make vegetarian ... replace meat and rice with a quinoa/millet/sorghum mix and diced potatoes/sweet potatoes


To Serve:
Slice in half lengthwise and top with additional tomato soup and pepitas

Tuesday, December 6, 2016

Pesto Pizza...Holiday Style

During the holidays I look to add traditional flavors and colors to a meal to add a festive flair to the day!


Making a pizza from a frozen crust is a time saving meal as it takes little time to prepare and can be customized to fit the flavor profile you are interested in at the moment.

I like to use Udi's Gluten Free Pizza Crust or Smartflour Gluten Free Pizza Crusts when I make a pizza from scratch.

While you preheat the oven you can prep the pizza toppings. The meal can be on the table in 30 minutes or less. You can add a cup/bowl of soup or a salad to accompany your pizza if you wish.

Pizza Pictured Here:
  • Homemade pesto sauce (enough to coat crust)
  • 2 minced cloves of garlic
  • 1/2 cup diced Vidalia onions
  • 1/2 large red bell pepper (or 1 small/medium size) - roasted and sliced lengthwise
  • 12 thin asparagus spears (or 6 thick spears) - roasted and diced
  • 1/2 to 3/4 cup of graded Parmesan Cheese (enough to cover toppings) 

Instructions:
  • Spread pesto on crust
  • Layer toppings in a creative and eye pleasing pattern
  • Cover with cheese
  • Cook according to crust instructions

NOTE: I used roasted vegetables that had been prepared earlier as I like the nutty flavor that comes from the roasting. You can use raw vegetables if you wish.

Monday, December 5, 2016

Gluten Free Holiday French Toast

French toast is great for breakfast or a snack. During the holidays when many of us are pressed for time, I find a breakfast that can double as a snack or dinner (quiche or french toast) is always good to prepare in volume.

Base Ingredients:
  1. Gluten Free Bread (can be regular bread if your household is not gluten free) - I used Udi's Cinnamon Raisin.
  2. Eggs and milk (I always use Almond Milk)
  3. Butter (to coast the pan)
Instructions:
  • Combine 2 eggs and 1/3 cup milk for every 4 pieces of break you wish to prepare. 
  • Poke a fork into the pieces of bread you wish to use to "open pores" so the egg mixture will permeate the bread...turn bread to evenly coat...let bread soak for 10 minutes on both sides.
  • Excess egg can be prepared as a small "side dish" of scrambled eggs.
  • Melt 1 TBSP butter (I use no-salt) in a pan and place bread slices flat on pan (2-4 depending on size of pan). Cook on medium. Use a spatula to rotate after 3-5 minutes on each side. 
  • The slices you do not eat right away can be stored in an airtight container in the refrigerator for a week.
Beyond Breakfast ... Ideas for Left Overs:
  • Post work-out snack/after school snack
  • Dinner sandwich with Canadian Bacon and a side salad or side of vegetables

French Toast can be eaten plain... warm or cold...as a sit down meal or on-the-go!

Pictured is French Toast (plain) with a side of holiday color fruit...KIWI and RASPBERRY.


Pictured is French Toast with Maraschino Cherry Chia Jam and Greek Yogurt/Raspberry topping.


Friday, December 2, 2016

Maraschino Cherry Chia Pudding

Versatile recipes are important to have in one's repertoire. I love this recipe as it can be a healthy breakfast, snack, or a dessert with just a simple ingredient swap. Enjoy holiday flavors, festive colors, and a quick prep dish this holiday season!


Base Breakfast Recipe:
1 Cup Almond Milk (Regular or Reduced Sugar)
1/2 Cup Maraschino Cherries + Juice (Cherry Man is my gluten free choice)
1 RIPE banana
1/4 Cup Chia Seeds (organic is preferred)

Instructions:
Mash the banana
Add the almond milk and cherries and stir till combined
Add the chia seeds and stir
Chill in the refrigerator for 30-60 minutes or until desired consistency (add more liquid or if you wish a "thinner" consistency)


To convert to a mid-day snack...serve 1 cup with a 1/2 cup of walnut pieces or slivered almonds and 1-2 tbsp shredded coconut (low sugar or sugar free)

To convert to a dessert...Use VANILLA Almond Milk or add 2 TBSP vanilla flavoring to the Base Breakfast Recipe.

Thursday, December 1, 2016

Pumpkin Spice Holiday Cake

I am a fan of Pamela's Products and purchased Spice Cake Mix and customized it to fit my family's needs. Customizing the package ingredients allowed me to make the cake my own.

  • I added 1 cup of pumpkin instead of the 1 cup of milk
  • I substituted "3 flax seed eggs" for the eggs (RATIO:1 TBSP ground flax seeds to 3 TBSP water ... mix...let rest till a gel like consistency forms)
  • I added 1/2 cup gluten free oats

I cooked in a 350 degree oven in an 8x10 baking pan for 55 minutes (or until toothpick inserted in center comes out clear).


Once cool...I made cream cheese frosting by combining the following on a bowl with an immersion blender:
  • 1 package of low fat cream cheese (room temperature)
  • 1 TBSP vanilla extract
  • 3 cups powdered sugar
  • 1/4 cup butter (room temperature) 
 
To serve: Garnish with fresh berries and nuts or dried fruits and nuts. I chose dried cranberries and walnuts to stick with the holiday theme


OPTION: OMIT the frosting and serve warm with a little butter or jam and fruit/nuts


Friday, November 11, 2016

Gluten Free Sandwich Series #3 Featuring Three Bakers Bread


Barbecue Chicken Sandwich Featuring Three Bakers Bread

Precooking (oven roasting) plain chicken breasts and using them through the week saves time in meal preparations. Starting with a plain base allows me to customize the flavor profile so each meal is unique!


Ingredients:
  • Oven Roasted Chicken Breast (Turkey or baked tofu can be substituted)
  • Roasted Vegetables (or leafy greens)
  • Parmesan cheese (optional)
  • Gluten Free Bread
  • Gluten Free Barbecue Sauce of choice
 
This sandwich is made with slices of oven-roasted chicken breast, sliced roasted vegetables, and sliced imported Parmesan cheese. Gluten free barbecue sauce was added to the bread to provide flavor.


To create the flavorful and moist sandwich with multiple textures, I thinly sliced the Parmesan cheese and added it to the bread so it would melt into the bread. I assembled the precooked parts while toasting the bread:
  • I sliced the chicken breast
  • I sliced the vegetables
To the toasted bread I added barbecue sauce on each slice then layered chicken on the bottom and vegetables on the top.

Enjoy this sandwich with soup, salad, gluten free chips, or a side of fruit or vegetables!

Gluten Free Sandwich Series #2 FEATURING Potapas


Sweet Potato Tortillas with Oven Roasted Chicken, Garlic, and Bell Peppers


During the busy workweek I try to make food that stretches for a few meals. I prepared two organic chicken breasts (with bone and skin) for the oven. I placed them in non-stick aluminum foil then sprinkled them with salt, pepper, and some olive oil. I baked them at 350 degrees until they were done (these took about 1.5 hours due to their thickness). Once cooled enough, I remove the skin and bone and place the chicken in an airtight container to store.

The chicken prepared this way is ready to be used in a variety of recipes during the week … all that needs to be done is to add a different flavor profile so that it does not taste like I am eating the same chicken every day!


For this meal I also roasted red, yellow, and orange bell peppers in the oven and baked a clove of garlic. This saved energy; as I only had to have the oven on once…and did not add extra heat to the house!


To put my sandwich together I placed two POTAPAS in the toaster oven and sprinkled Italian Blend Cheese over both of them to form a thin coat. When the POTAPAS were done toasting, I added a few cloves of roasted garlic to each one. I placed two slices of roasted pepper (all that fit on one side of the POTAPAS); I used a variety of colors, on one side of the POTAPAS and 1/4 of the chicken breast thinly sliced. I closed the tortilla sandwich and cut it in half.


Ingredients:
1.     POTAPAS
2.     Clove of Garlic
3.     Chicken Breast
4.     Bell Peppers
5.     Italian Blend Cheese

Serving Suggestions:
·      Serve with a bowl of soup, salad, or bowl of vegetables
·      You could serve with GLUTEN FREE chips such as Beanfield’s.


Recipe Variations:
·      Roasted squash or zucchini can be swapped for the bell peppers
·      Turkey could be swapped for the chicken
·      The meal could be made vegetarian by omitting the chicken and adding more cheese – perhaps melted Gouda or Parmesan


Wednesday, November 2, 2016

Pomegranate + Amaranth = Bountiful Breakfast


Hot cereal is a satisfying meal to start your day. Amaranth is a good choice to use for hot cereal as it is high in protein and will keep you satisfied for a while. Use it before a morning work-out or before heading off to school. The texture and consistency is a bit thicker than Cream-of-Wheat. Add the seasonal fresh fruit of your choice (or diced dried fruit) to the dish when serving and enjoy!

Pomegranates tend to be expensive. You may be lucky and have a friend who has a tree or find a sale in the store. The fruit is worth the splurge from time-to-time as the antioxidant health benefits are tremendous.


Q: How does one remove the seeds from the pomegranate without getting red all over the place?
A: This recipe uses the antioxidant rich pomegranate as the fruit of choice. To remove the seeds from a pomegranate without getting the red color of the liquid to stain your hands and clothes, follow a few basic steps:
First, cut the pomegranate in half from top to bottom. I suggest you put a kitchen towel over the fruit and knife so any liquid sprays into the towel.
Second, put the sliced fruit into a bowl of water. Use your fingers to remove seeds from membrane while submerged into the water. The seeds will sink and the membrane will float.
Third, remove the membrane from the water and drain the water. This will leave the pomegranate seeds to be used in your recipe.

Base Ingredients and Variations:
 
3 3 cups of liquid (I use 1 part almond milk and 2 parts water)
1 1 cup amaranth grain (I use Bob’s Red Mill)
1 1 cup seasonal fruit (or diced dried fruit)
     (I used half pomegranate seeds and half banana slices)
11 1/2 cups nuts (I used slivered almonds for this recipe – look for a nut that goes with the fruit chosen)
1 1/2 tsp almond flavoring (substitute vanilla or maple – use a flavor profile that works well with the fruit you are using)
1 1 tbsp local raw honey (optional addition to top the cereal)


Instructions:
  1. Amaranth grains need to be cooked with a ratio of 3 cups of liquid to 1 cup of amaranth. I increased this recipe so that I would have left-overs and used 4.5 cups of liquid to 1.5 cups of amaranth grain. I started by boiling 3 cups of water in a pot then adding the amaranth. As the liquid absorbed into the grain I added 1.5 cups of almond milk .5 cups at a time and stirred to integrate the almond milk.
  2.  When the liquid is almost absorbed, add the flavoring and stir. 
  3. Let hot cereal rest for 5 minutes and serve or store in an airtight container for later.


Saturday, September 10, 2016

Gluten Free Sandwich Series #1: Chicken Breast with Olive Tapenade

As a schoolteacher I view late August and early September as BACK TO SCHOOL SEASON. For me it means getting back into routine and spending MORE time working and less time in the kitchen/at the dinner table.


This fall I am doing a SANDWICH SERIES on the blog. I am highlighting quick and easy GROWN UP SANDWICHES that can be made for that busy weekend when you have to take children to games and practices, that work night where you need to be your son or daughter's #1 fan and have little time to cook, or that day when you need to use leftovers so they do not spoil. We all strive for a meal where we can take some time to decompress after a busy day but do not always have that luxury. A sandwich can be made in relatively no time and can be accompanied by a salad, cooked vegetables, vegetables or gluten free chips and hummus, or some fruit. A sandwich can be taken on the go to be consumed at a game or other event. Take the time to plan your meal so that you do not have to go through a drive through line and order into a "box".

Today's sandwich is CHICKEN BREAST WITH OLIVE TAPENADE

Base Ingredients:
Gluten Free Bread of choice (in this photo I used Udi's Millet Chia)
Chicken breast (cooked)
Olive tapenade (you can make your own or buy the spread - when I make my own I OMIT the anchovies)
OPTION: Swap out the sauce...use PESTO or BBQ sauce instead of the olive tapenade
Lettuce (other green of your choice) or sprouts to add to the sandwich for texture


Instructions:
  1. I bake an organic chicken breast  in non-stick aluminum foil in the oven to be used for a sandwich later in the week (planning ahead saves time when you know in advance you will be facing a time crunch)
  2. When you are ready to make your sandwich, toast the bread you wish to use and get out all the ingredients
  3. OPTIONAL: You can warm your chicken while the bread is toasting if you like
  4. When the bread is done, spread the tapenade on each slice and add the chicken and/or greens/sprouts.
  5. Serve or put in a container to take with you and enjoy later


Friday, September 9, 2016

Pancake a la Amsterdam

A MEMORABLE meal in Amsterdam was a gluten free pancake...yes a SAVORY PANCAKE. My husband and I were told to have pancakes by our friends when we told them we were traveling to Amsterdam. Once we got there we researched gluten free pancake options and saw that the options were greater than we anticipated. Not only were there a few places from which to choose, but there were options for breakfast and lunch pancakes. Most restaurants serving pancakes were open until mid to late afternoon. We decided to go for a savory lunch pancake as that was something new for us!

Once we got to the restaurant we were amazed! The place was packed with people and the wait was 30-45 minutes. It was worth the wait!


The pancake texture was between an American version of a crepe and a pancake. I ordered a pancake with vegetables and pesto sauce and decided I needed to find a way to recreate at home so we could enjoy savory "Amsterdam Style" Pancakes.

I took a crepe recipe from Pamela's Products (Baking and Pancake Mix) and modified it until I achieved the desired texture.

Base Recipe I Devised:
1 1/3 cup Pamela's Baking and Pancake Mix
1 egg at room temperature (I use free range eggs when possible)
1 cup Almond Milk

Additional Ingredients:
Oil (I used walnut oil)
Pesto Sauce
Basil
Shrimp
Vegetables - onion and zucchini (colored bell peppers work well also)


Preparation and Cooking Instructions:
  • I used a mandolin to cut thin slices of onion and zucchini (fresh from the garden)
  • I mixed the pancake, heated and oiled the pan, then added the pancake. Similar to cooking a crepe, I added the mix to the center of the pan and rotated the pan until and batter went almost to the edges. THEN I added the thin sliced vegetables to the pancake in a decorative pattern.
  • I flipped the pancake when bubbled formed in the middle...about 3-5 minutes into the cooking process
  • In a separate pan I sauteed shrimp and served the shrimp as a garnish (as a vegetarian was eating the meal with us). The shrimp could be precooked, diced, and added to the pancake if you wish. 
  • Serve warm...the pesto sauce can be drizzled on the pancake or in a ramekin and used as a dipping sauce
  • I garnished with fresh basil BUT it could be diced and also added to the pancake while cooking to layer the flavor.


There are numerous possibilities for the Pancake a la Amsterdam...as I experiment I will share them with you!


Monday, September 5, 2016

Giveaway from Canyon Gluten Free Bakehouse + Love With Food

HUGE Gluten-Free Giveaway!

3 Winners will score a HUGE Prize Pack full of every product Canyon Gluten-Free Bakehouse makes!

Visit This Link to Enter. There are 20 days left!

JR Date Bar

I have been searching for the formula to create my own date snack bars and finally hit the jackpot. The recipe allows you to customize the bars to create the flavor profile you desire. You can wrap them in Saran Wrap or Aluminum Foil (I prefer non-stick), carry them in a Ziplock baggie, or carry with you in a small plastic "tupperware" type of container.

The bars have two simple ingredients and the third or fourth is the flavor profile you create. The recipe is so simple you will be making these quite often! The most challenging part of this recipe is that the bars need to be refrigerated for at least 30 minutes to "set". Patience is required prior to "digging in".

Enjoy these energy bars before, during, or after a workout or as a simple mid-day snack.


Base Ingredients:
1 Cup of Dates (I get mine from Futterman Farms) - pitted and diced
2 Cups of Nuts - your choice to use one nut or a mix to create the flavor profile of your choice
1/3 Cup Flavor Ad-Ins

Step 1:
  • Place nuts in a VitaMix or a food processor and pulse until they break up and BEGIN to form a paste. You want to keep some chunks and stop processing PRIOR to creating Nut Butter.
  • Add dates and continue to pulse to combine.

Step 2:
Add 1/3 Cup of Flavor Add-Ins and pulse to combine.
Add-Ins can include:
Dried Cranberries (pictured)
Dried Cherries and Coconut
Dark Chocolate Pieces + 2 TBSP Nutella
Dried Diced Apple + 2 TBSP Cinnamon
Dried Diced Apricot + 1 TBSP Almond Flavoring

Step 3:
  • Transfer JR Date Bar Mixture from VitaMix or food processor and place in an 8x8 glass pan. I suggest using spray olive oil or parchment paper or Saran Wrap to coat the pan so the date bars do not stick. 
  • Cover the pan and place it in the refrigerator to cool for at least 30 minutes. 
  • Cut the bars to the size you desire and enjoy!

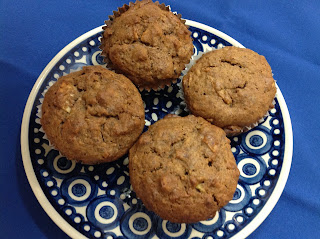
Apple Cinnamon Walnut Gluten Free Whole Note Muffins

I love Whole Note products as they are healthy and satisfying gluten free baking mixes. As a baked that likes to modify recipes to create fascinating mixes, Whole Note products provide a perfect base to create HEALTHY RECIPE VARIATIONS.

I used the Create-A-Muffin Mix to make Apple Cinnamon Walnut muffins. They turned out fluffy, moist, chewy, and flavorful. (I do love the muffin mix made without adding anything!) The muffins can be served either warm or cool. You can enjoy them with butter, Chia jam, or even a nut or seed butter.


Ingredients:
Whole Note Gluten Free Create-A-Muffin Mix
2 large eggs (I use free range)
3/4 cup of milk (I use almond milk)
1/3 cup of oil (I used walnut oil in this recipe)

Substitutions I made:
Added: 4 TBSP ground cinnamon
Added: 1 large apple - sliced thin and then diced into small pieces
1/2 cup homemade applesauce for the milk
Added: 1 cup of walnuts (diced so some are ground into a walnut flour)

Instructions:
Combine wet ingredients in a stand up mixer
Add dry and mix until combined - do not over mix
Line a muffin tin with "skirts" and fill "skirts" 3/4 full for small muffins or full for large muffins with significant "muffin tops"

Bake: 350 for 20 minutes (depending on size of muffins) then check by inserting a toothpick in center or largest muffin. If toothpick does not come out clean, continue cooking and checking every 5 minutes.


Sunday, September 4, 2016

Date Smoothie

Date shakes are a MUST when one is visiting Palm Springs, California. The combination of yogurt and dates is a delightful treat in the desert heat.

A DATE SMOOTHIE is another way to enjoy dates. I get my dates from Futterman Farms in Indio, California. I was introduced to the owner of the farm at my local farmer's market. Anyone can get the incredible dates from Futterman Farms as they do ship them to you!


Date Smoothie Ingredients (for 1 large glass or 2 small)
  • 8 ounces of Almond Milk (you can use the milk of your choice)
  • 1 ripe banana
  • 1 TBSP sunflower butter (I use SunButter)
  • 1 cup of dates (pitted and chopped)
  • Date to garnish glass

Recipe:
  • Add banana, 1/2 or the dates, and 1/2 of the milk to your food processor or VitaMix. Pulse to pulverize dates. 
  • Add remaining dates and milk to combine 
  • Add SunButter
  • After everything is combined, pulse at HIGH SPEED for about 1 minute to add volume

Pour into a glass or two and garnish with a date.


Thursday, August 18, 2016

Gluten Free Skin and Hair Care from Mother Dirt

We take care of our bodies by eating well, exercising, and getting enough rest (if possible). Many people have found that skin problems have diminished once they have changed to a gluten free diet. Gluten free goes beyond what we put INTO our bodies, it also is part of what we put ON our bodies via skin care treatments, hair care products, and cosmetics. 

Mother Dirt products provide an opportunity to restore skin to its natural state. Their scientific research has shown that modern chemicals strip the body of helpful bacteria in the cleansing process.  This research helped them develop a product that cleanses AND restores the body's natural bacteria.

I have been using the product for a few weeks and have found that the skin on my face and neck is smoother. Mother Dirt products clean without leaving a dry feeling to the skin! The shampoo leaves my hair smooth and shiny! The combination of the AO Mist and Shampoo have given me the opportunity to go a day or two between washing my hair...even in the hot summer weather!

If you wish to try Mother Dirt, you can follow this link and use this code (Myblog25-GF8) to get 25% off your purchase.


Monday, August 8, 2016

Amaranth Hot Cereal with Seasonal Fruit


Hot cereal is a satisfying meal to start your day. Amaranth is a good choice to use for hot cereal as it is high in protein and will keep you satisfied for a while. Use it before a morning work-out or before heading off to school. The texture and consistency is a bit thicker than Cream-of-Wheat. Add the seasonal fresh fruit of your choice (or diced dried fruit) to the dish when serving and enjoy!


Base Ingredients and Variations:
·      3 cups of liquid (I use 1 part almond milk and 2 parts water)
·      1 cup amaranth grain (I use Bob’s Red Mill)
·      I cup chopped seasonal fruit (or diced dried fruit)
·      .5 cups nuts (I used slivered almonds for this recipe – look for a nut that goes with the fruit chosen)
·      1.5 tsp almond flavoring (substitute vanilla or maple – use a flavor profile that works well with the fruit you are using)
·      1 tbsp local raw honey

Instructions:
1.    Amaranth grains need to be cooked with a ratio of 3 cups of liquid to 1 cup of amaranth. I increased this recipe so that I would have left-overs and used 4.5 cups of liquid to 1.5 cups of amaranth grain. I started by boiling 3 cups of water in a pot then adding the amaranth. As the liquid absorbed into the grain I added 1.5 cups of almond milk .5 cups at a time and stirred to integrate the almond milk.
2.    When the liquid is almost absorbed, add the flavoring and stir.
3.    Let hot cereal rest for 5 minutes and serve or store in an airtight container for later.


Serve:
Top with fruit and nuts of your choice and 1 tbsp honey
You may add additional almond milk if you prefer a thinner texture.


Reheating:
Add 6 TBSP milk to your bowl and stir prior to reheating in the microwave for 1-1.5 minutes depending on your microwave

Friday, August 5, 2016

Gluten Free Veggie-of-the-Day Burgers


I used to enjoy eating veggie burgers when I went out to eat but had to remove them from my dining options when I became gluten free. I have experimented with creating several variations of a veggie burger and have found one that comes close to my old restaurant favorite! You can customize this recipe and use different vegetables each time you make this if you like. It is a great way to use up small portions of a variety of vegetables or an abundance of one vegetable from a summer harvest!

Serve with a gluten free bun and add the toppings of your choice (based on ingredients used in the patty): sriracha, ketchup, mustard, pesto, cheese, or olive tapenade.


Ingredients:
·      1 Cup TVP – textured vegetable protein (I use Bob’s Red Mill TVP)
·      2 Cups cooked vegetables roughly chopped in a food processor – see below
·      1/2 Cup Gluten Free oats
·      1/2 Cup Gluten Free Panko Bread Crumbs
·      4 TBSP Seasoning – I suggest Cajun, BBQ, Asian, or Chipotle
·      1/2 Cup Low Sodium Vegetable Broth
·      1 TBSP Olive Oil for sautéing vegetables
·      4-6 TBSP Olive Oil for sautéing burgers

Vegetable of the Day used in this recipe … start with 4 cups of chopped uncooked vegetables to make 2 cups once diced in food processor. The veggie burger is a GREAT way to use “bits and pieces” of vegetables that are left in your refrigerator.
·      4 Crushed garlic cloves
·      1/2 Vidalia Onion (or onion of choice…substitute 1 shallot or 1 leek)
·      1 Medium sweet potato (substitute potato)
·      1 Bunch Chard …about a pound or 15 leaves/stems (substitute cauliflower or broccoli flowers AND stems or 5-7 large carrots)


Instructions:
1.    Dice and sauté onion and garlic in a pan with olive oil until translucent.
2.    Add remaining vegetables and broth and cook until el dente or just a bit softer
3.    Dice in a food processor into a chunky paste
4.    Add 2 cups of vegetables and dry ingredients to a bowl and combine into patties – it will make 4-6 depending on the size burger you wish to make.
5.    Place Gluten Free Panko crumbs on a plate and coat the patties with the crumbs
6.    Place olive oil in a pan and heat to medium high
7.    Add veggie burgers and sauté for 3-5 minutes on each side. Press down with a spatula half way through on each side
8.    Serve on a toasted gluten free bun (I used Udi’s for this picture) and add melted cheese, ketchup, mustard, sriracha, or pesto if desired based on seasoning used in the patty.